


- Shave the brussels sprouts and cabbage using a sharp knife. Add them to a large bowl.
- Thinly slice the kale into fine ribbons. I like to roll the kale leaves together width-wise and then slice them from top to bottom. It’s quick and easy! Add these to the bowl as well.
- You can eat them as raw by combining with the mustard dressing or wilt with stir-fry method.
- In a separate small bowl, combine salt, mustard, lemon juice and olive oil. Whisk together to form the dressing. Pour the dressing over the ingredients in the bowl and massage together with your hands. Taste and adjust seasoning as needed.
- Add cooked black rice and quinoa.
- Serve with hemp hearts and fresh parsley.
- Heat the olive oil in a large pan. Once hot add the zucchini, carrots, onion and garlic. Cook until garlic is fragrant.
- Add the broccoli, raw cashews and water. Bring the mixture to a bowl, then reduce heat to a simmer. Cover and simmer for 20 minutes until the broccoli is soft.
- Transfer this mixutre to a blender and blend until smooth. Add nutritional yeast and lemon juice. Season with salt and pepper. Blend well
- Taste and add a touch more salt and pepper if needed.
- Top with fresh parsley, toasted pine nuts and red chili flakes if desired.
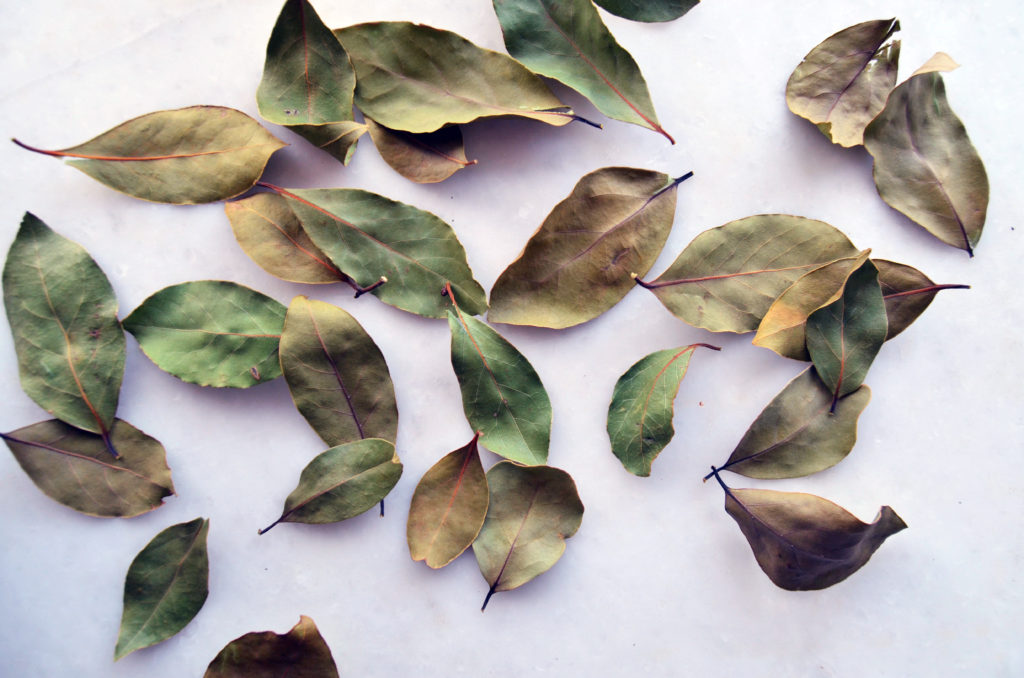
- Lay a paper towel onto a large baking sheet enough to accommodate all of the bay leaves so they’re not touching.
- Spread the bay leaves onto the paper towels. Don’t layer the leaves on top of each other, let them have their own space to ensure that they dry evenly. If you have a lot of bay leaves, use another baking sheet.
Don’t mix bay leaves with other herbs because they’ll have different drying times. - Place the baking sheet in a warm, dry room that has plenty of ventilation. Make sure the leaves aren’t exposed to direct sunlight because it will cause the leaves to wilt and brown.
Indirect sunlight is okay, but not ideal. - Check on the leaves after 1 week and flip them over. Flipping the leaves will allow each one to dry evenly and at the same pace.
- Let them dry for 1 more week. Notice whether there is any remaining moisture left in the leaves. If they are still dark green in spots or soft, they may need another 3 to 4 days or 1 full week to dry.
If some of the leaves are already dry, remove them and store them in an airtight container. - Strip the leaves away from the stems and store them in an airtight container. Discard the stem and store the whole leaves in a plastic zipper bag or airtight container. When stored properly, dried bay leaves will last for up to 1 year.
- Rinse the bay leaves under a cool, gentle stream of water. Gently massage the leaves to remove any dust and debris then shake off as much of the water as possible and pat them dry with a paper towel. You can also put the herbs in a colander and stir it around with your fingers.
Let them dry fully for about 1 to 2 hours before putting them in the dehydrator. - Set your dehydrator to 42°C.
- Arrange the herbs on dehydrator trays in a single layer. Make sure the herbs are not touching or overlapping in any way to prevent uneven drying. If your dehydrator has multiple shelves, use a second dehydrator tray if you need to.
- Allow the herbs to dry for 1 to 4 hours, checking on them each hour. Bay leaves can take anywhere from 1 to 4 hours to dry depending on your dehydrator and the level of humidity in the air. If they’re not brittle and crispy after 1 hour, leave them in for another 30 minutes to an hour before checking again.
- Consult the instruction booklet that came with your dehydrator to see if it offers any suggested drying times.
- Remove the dried leaves from the dehydrator and let them cool. You will know they have completed drying when they begin to curl or crumble and the stems start to split. Leave the tray on the kitchen counter to cool for 1 hour.
- Avoid exposing the dried herbs to direct sunlight while they’re cooling.
- Remove the stems and store the dried leaves in an airtight bag or container.

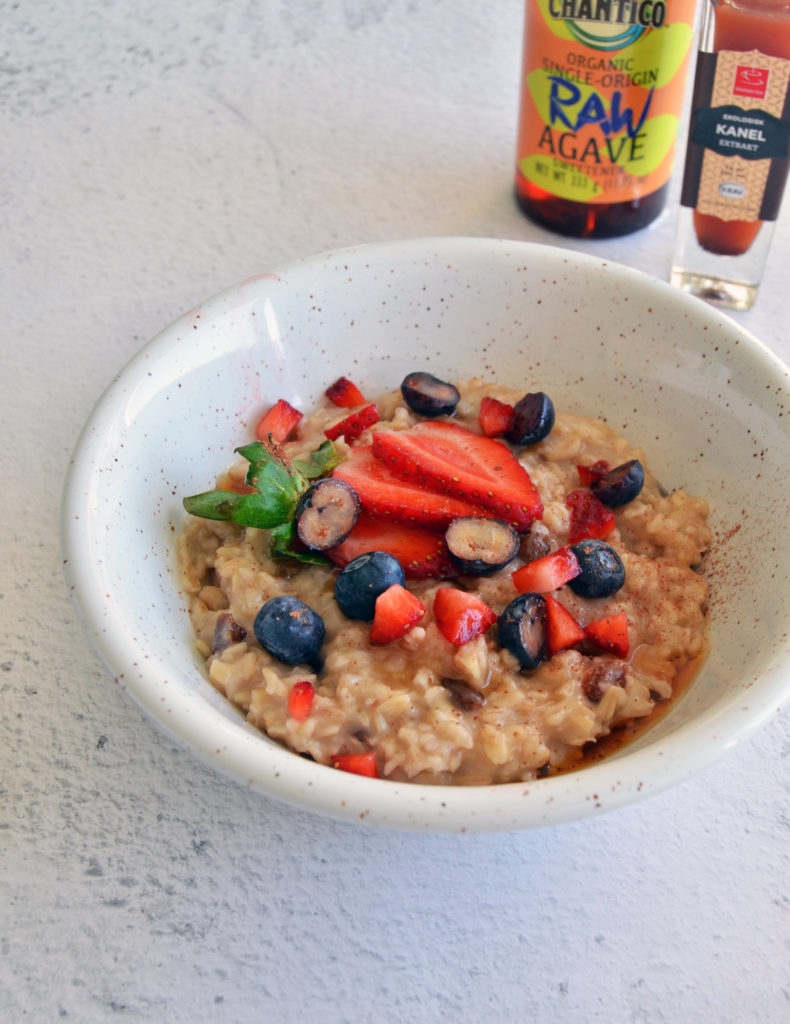
Ingredients:
1 cup rolled oats
1.5 -2 cups water or almond milk
1 tbsp raw agave or more if you need ( alternatively dates can be added)
1/4 tsp pink himalayan salt
1/2 tsp cinnamon extract or powder
Toppings:
Buckini ( activated & dehydrated buckwheats)
Sliced strawberries and blueberries
or whatever you like.
Instructions:
1. Soak the oats for at least a couple of hours minimum, but better to soak them overnight in 4 cups of water if you have the time. In the morning strain and add 2 cups of clear water or plant based milk.
2. If you’re using dates in the place of agave , you may want to soak the dates as well, you can use the date soak water as part, or all, of the 2 cups needed in the recipe to make it just a little bit sweeter.
3. Next ,place the rinsed oats, dates, and the two cups of water (or, use some of the date soak water) in a blender or food processor and blend or process on high speed for about 25 seconds or until the mixture is smooth.
4. Place into a bowl and cover. Move to food dehydrator. Cook at 42 C for 2-3 hours or until soften and warm enough. Mix well. Taste it, add more cinnamon or sweetener if you need.
5. Top with chopped blueberries, strawberries, cinnamon powder and buckinis.

The Health Benefits Of Red Cabbage
Red cabbage is one of the best ingredients you can juice to help normalize your digestive system and beat bloating. Not only does red cabbage juice help heal your gut, it has plenty of other health benefits as well. It contains Vitamin C and Vitamin K, along with several other essential vitamins and minerals. The Vitamin C in red cabbage acts as a powerful antioxidant that helps fight inflammation in the body while protecting the cells from damage.
Red cabbage contains phytonutrients, which are natural anti-inflammatory compounds. A study published in Research in Pharmaceutical Science found that the consumption of cabbage led to a reduction in swelling. The phytonutrients in red cabbage make it a natural remedy for bloating and inflammation.
Would you like to give it a try? Here is my healthy red cabbage juice recipe:
Ingredients:
1 head red cabbage,
100 ml. coconut water,
1/2 tsp cayenne pepper,
2 inch ginger root peeled,
Juice of 1 lime
Method:
Cut red cabbage into pieces. Place all ingredients into your juicer. Juice, mix well and drink immediately.

Ingredients:
For the rolls:
2 large english cucumbers,
2 tbsp black sesame,
1/2 cup sprouted pea and chive,
1 tbsp capers
For the sauce:
1 ripe avocado,
1/2 tsp pink himalayan salt,
2 tbsp fresh lemon juice,
1 tsp onion powder,
1 tsp garlic powder,
3-4 slice jalapeno
How to make:
Rolls:
Wash and dry your cucumber. Use a mandolin to cut thin slices all the way through. Keep slicing the sides until you reach the full centre.
Sauce:
Place all sauce ingredients into the food processor, mix on high speed until you get silky smooth mixture.
Assemble:
Lay out each cucumber slice and layer a coat of the avocado spread all the way across.
Start to roll on one side until you reach the end.
Dress up with sprouted pea, sesame and sprouts. Serve cold!

This raw avocado chocolate cake recipe was one of the first recipes I’ve developed when I was providing raw cake trainings in between 2018-2019. This one is a little more developed over time. It is so easy to make and super delicious! I guarantee you will love it.
Cashews, which are used commonly in raw cakes, can give a feeling of density, are not economical in today’s conditions, and also are not produced under ethical conditions. So we have quite a few reasons to give up cashews. There are still no fair trade cashews in many countries. Unfortunately, most of the cashews come from places such as India, Ivory Coast, Vietnam, where human labor is exploited, where there is no fair working and hygienic production conditions. If you are a vegan who questions the source of the product you use, you might be interested in this video:
When we say goodbye to cashews, one of the great alternatives we can use in raw cakes is avocado- the healthiest fat in the world! It grows locally in so many countries today. No matter how high the avocado tree’s water consumption is, we can contribute to our planet by consuming it in season and minimizing our purchase of out-of-season products.
Yield: 15 cm round cake – 6 pieces
INGREDIENTS
Cake Base:
40 g dried white mulberries
40 g raw hazelnut butter
40 g buckini (activated and dehydrated buckwheat groats, see notes*)
15 g raw cacao powder 30 g maple syrup (or similar liquid sweetener of your choice, see notes**)
1/8 teaspoon pink himalayan salt
Avocado Chocolate Cream:
1 ripe avocado (approximately 150-160 g, weight after peeled and core removed)
30 g raw cacao powder
60 ml maple syrup (or a similar liquid sweetener of your choice, see notes**)
60 ml almond milk
30 ml coconut oil melted
25 ml cacao butter melted
5-6 drops of food-grade wild orange essential oil (or mint, lemon, rose etc. choose a flavor and use only, see notes*)
1/8 teaspoon pink himalayan salt
INSTRUCTIONS:
1. Throw the white dried mulberry into the food processor and mix it until it comes to a crumb form.
2. Then add the buckinis (buckwheat groats that you soaked in water for 1 hour, rinsed and dehydrated at 46 C for 4-5 hours, beforehand) Mix mulberry and buckini together.
3. Then run the food processor again, adding raw cacao powder, maple syrup, hazelnut butter and salt. Mix in the food processor until everyting combines together.
4. Remove the dough from the food processor and transfer it to a 15 cm round cake tin lined with parchment paper. Spread and flatten the dough by pressing it down with your hands, cake mould handle or with the back of a spatula or spoon.
5. Transfer all cream ingredients, except coconut oil and cacao butter, to a blender. Blend until it becomes a smooth liquid. Then add the melted coconut oil and cacao butter and mix again. Taste the mixture, adding a little salt or sweetener if needed. Depending on the variety, softness and fat content of your avocado, you may want to add another tablespoon or two of almond milk. The consistency should be slightly thick but at the same time pourable fluidity.
6. Pour the mixture on the cake base, smooth it out with a spatula or gently shake the mold from side to side to prevent bubbles.
7. After 2 hours in the freezer or 4 hours in the refrigerator, remove from the mold, cut into pieces and serve.
8. Garnish with orange zest or edible flowers. You may also want to dust some the raw cacao powder on top and garnish with raw cacao nibs.
Important Notes on the Recipe:
***The intensity of essential oils can vary from brand to brand, start with 2-3 drops, taste and then continue adding. Adding too much at once can cause bitterness. Medicine Flower or doTERRA brands are my favorite.
**Maple syrup, date syrup, grape molasses or coconut nectar syrup can be used as liquid sweetener in this cake. If you use date syrup or grape molasses, it will not comply with the raw nutrition rules, but you will still get a delicious cake. Agave can also be preferred as a raw alternative, but I personally do not recommend it anymore. Agave has the highest fructose content of any commercial sweetener on the market. Yes, that’s right, Agave Nectar beats table sugar and even high fructose corn syrup. Agave is 90 percent fructose, while maple syrup is around 35 percent.
While some people avoid high fructose corn syrup, which only has a fructose content of 55%, they continue to take agave because of its low glycemic index while unknowingly consuming a product with 90% fructose.
Alternatively, you can use whole dates, in this case, soak the dates in water, drain them, then puree them with very light water and add them to your avocado mix.
*As an alternative to buckini, you can use any nut flour ( for nut-free nutty alternative use tiger nuts) , but if you want a crunchy base, buckini is the best alternative. To make the buckini, put the raw (green) buckwheat groats in a bowl, cover with warm water. Let it soak in water for 1 hour. After 1 hour, squeeze a few pieces with your hand and check, if it breaks easily, it means it is activated. Transfer to a strainer, rinse thoroughly under running water and drain. Then, spread it thinly on the dehydrator and dehydrate at 46 degrees for 4-5 hours or until completely dry. Gently move the buckwheat groats with a spatula every hour or so to make the dehydration process easier.
Now the buckini is ready, transfer it to a glass jar, close the lid and store it at room temperature for months, you can use it in your raw recipes.
If you have a dehydrator, this is a very easy process, but if you do not want to be involved in this long process, you can purchase activated dehydrated buckwheat groats from the health stores. Sprouted dehydrated versions are also great in this recipe.
TIP: If you don’t like to consume oil, try this recipe in the jar. Just remove the coconut oil and cacao butter from the ingredient list. It will still taste so good. Today I don’t consume bottled oils as before and usually make my cakes in the jars. No need to wait to solidify the oils in the cream for long hours. It is also healthier, more economical, and much more delicious! Cake or jar cake may be preferred depending on the situation, you may want to make a birthday cake using oil for your loved ones, or you may just want to enjoy a healthy dessert for yourself without oil. You can use my base recipe for any kind of ocassion.
If you loved this recipe, you might be interested in our Gourmet Raw Cakebook: A complete guide to raw vegan cakes.

Ingredients:
1 bunch collard greens or kale chopped thinly
250 gr. brussels sprouts shredded
250 gr. white cabbage shredded
3-4 tbsp hemp hearts
1/2 cup black wild rice cooked
1/2 cup quinoa cooked
5 tbsp lemon juice
2 tbsp mustard
1 tbsp maple syrup
1/2 tsp salt
2 tbsp olive oil
1/2 bunch fresh parsley chopped
Method:

Ingredients:
2 tbsp olive oil
300 g. broccoli florets chopped
1 zucchini chopped
2 carrots chopped (optional)
4 garlic cloves
1 medium red onion or leek chopped
A handful of raw cashews
2 cups water
2 tbsp nutirional yeast ( optional)
2 tbsp lemon juice
Salt and pepper as needed
Method:

Ingredients:
1 large red onion,
4-5 bay leaves,
3 tbsp olive oil,
1 tsp mustard seeds,
1 tsp black pepper seeds,
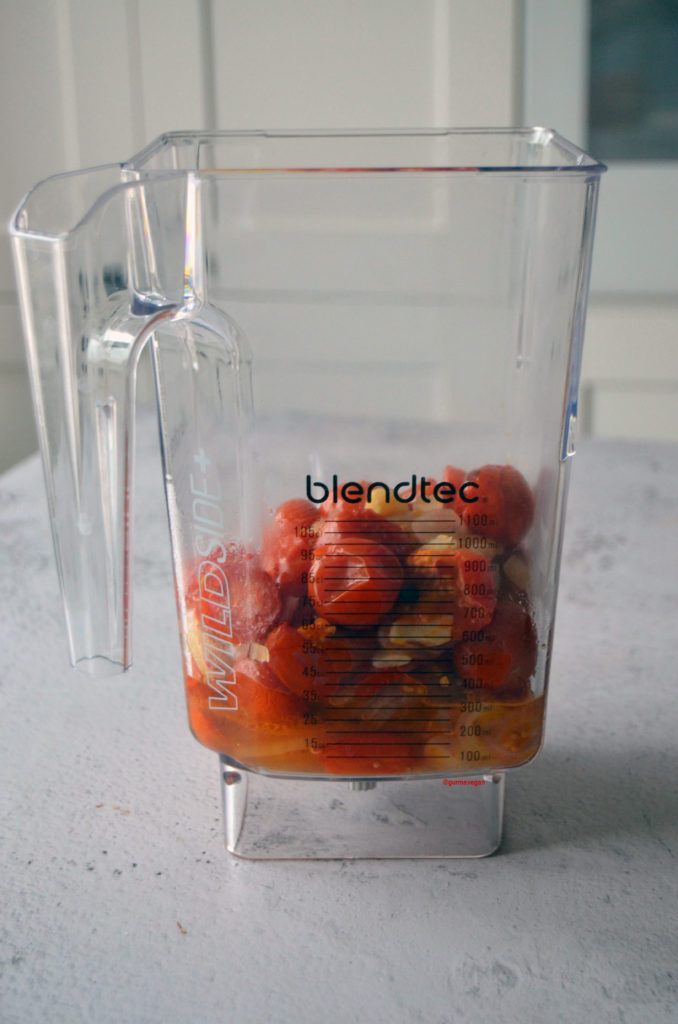
1 kg tomatoes,
600 ml water,
5-6 garlic cloves,
1 tbsp tomato paste


Pine Nut Chipotle Crunch:
40 gr. pine nuts
1/4 tsp chipotle powder
1/8 tsp salt
1/8 tsp bay leaves powdered
To make pine nut chipotle crunch, add pine nuts into a pan, toss until golden brown. Then transfer in a very small food processor, add chipotle, bay leaves powder and salt. Blend until crumble but not powder.
Method:
1. Line a parchment paper on the large tray. Place diced onions, halved tomatoes, garlic cloves and bay leaves. Spread mustard and black pepper. Drizzle some olive oil. Place in the oven and cook at 200 C until soften and golden brown.
2. Then remove tray from the oven. Let it cool for 15 minutes. Remove bay leaves we won’t add them into the mixture. Then transfer rest of the ingredients into a large blender. I use blendtec wide side jar for soups. Add tomato paste and olive oil. Blend until smooth.

3. Then transfer into a deep pot. Cook on medium heat until bubbled. Add more water and cook depending on your preference.
Divide among bowls and top with pine nut chipotle crunch or toasted seeds or nuts, and somthing green -scallions, parsley, or a few cilantro leaves.


Ingredients:
1 cup orzo,
2 cucumbers sliced,
1 cup cherry tomatoes halved,
A handful of baby arugula,
2 garlic cloves,
1 tsp sumac,
2 tbsp olive oil,
2 tbsp fresh bergamot juice,
1 tsp salt and black pepper to taste
Method:
1.Cook orzo in salted water. Drain and rinse with cold water, until cooled.
2. Place sumac, olive oil, garlic and bergamot juice in a food processor. Pulse repeated until combined. Add salt and pepper.
3. Place cooled orzo into a bowl and toss with the flavorful sumac bergamot sauce. Add additions-arugula, cucumber and tomatoes. Serve cold.


Fresh bay leaves have a lighter, more floral flavor, and they keep for weeks in the fridge. If there are more leaves than you need, it will be good to dry them out.
Air-drying bay leaves is the best way to preserve their fragrant and flavorful essential oils, but this takes approximately 15 days, you can also use a dehydrator to shorten the time.
Methods:
Air-Drying:
Dehydrator:

References:
https://theherbalacademy.com/dry-fresh-herbs-using-a-dehydrator/
https://www.cookinglight.com/cooking-101/techniques/how-why-to-wash-fresh-herbs
https://wimastergardener.org/article/drying-herbs/